The blink Camera is the perfect way to keep an eye on your property. This affordable and easy-to-use security camera can be set up in minutes. It is an excellent choice for anyone looking for a reliable way to monitor their property.
After completing the Blink Setup process, you’ll be able to see who’s at your door or window, day or night. The camera’s two-way audio feature lets you talk to visitors from anywhere in the world, and the built-in motion sensor will send you alerts whenever someone enters your field of view. You can also use the blink Camera to take pictures or record videos of activity on your property.
Table of Contents
Setup and Installation Steps:
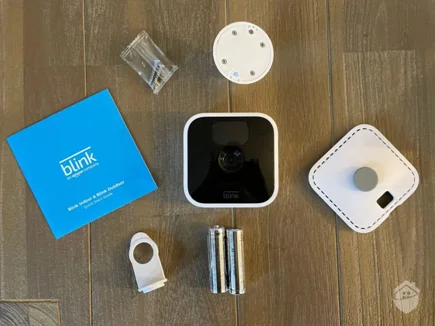
A Blink camera is a great option if you’re looking to improve your home security. They’re easy to set up and relatively affordable, making them one of the most popular security cameras in the market. Here, we’ll show you how to set up and install a Blink camera in just a few simple steps.
Step 1: Download the Blink app.
First, connect your device to the Internet. Next, download the Blink app from either Google Play or Apple’s App Store. The Blink app is compatible with both Android and Apple devices.
Step 2: Connect the camera to your home network.
The next step is to connect your Blink camera to your home network. You can do this using the Blink app. First, ensure your camera’s power cable is plugged into a nearby electrical outlet. Next, open up the Blink app on your device and tap the Connect button at the top of the screen. The app will search your home network for available Blink cameras.
Step 3: Add your camera to the Blink account.
When your camera’s name appears on the list, tap to add it to your account. This will pair your camera with your device. You’ll then be able to name your camera and give it a location. Note that you can add multiple cameras to this app, but we’ll focus on adding one at a time. After adding your camera, tap Done to return to the main screen.
Step 4: Add a microSD card and configure your settings.
Next, insert a microSD card in the slot of your Blink camera. To begin configuring your camera, tap Settings in the top-right corner of the screen. You can configure your camera’s settings, including naming and selecting a location. Now, tap the Motion Detection slider.
You can select either “Any Motion” or “No Motion.” Now, tap the Privacy Mode slider to determine how long your camera will store video on the microSD card. You can choose to have your camera record video “For Myself Only,” “For Myself and Friends,” or “Public”. Next, tap the Advanced Settings slider to access the following options:
Tips for using Blink Camera
A Blink Camera is an excellent option if you’re looking to improve your home security. Blink Cameras are inexpensive, easy to install, and offer two-way audio and motion detection features.
Video Quality: To save space on the microSD card, you can reduce the video quality of your Blink camera. You can choose between “Normal,” “High,” and “Super. We’ll use the “Normal” video quality for this tutorial.
Motion Tagging: This setting allows you to tag a video with a date and time stamp when motion is detected. This allows you to easily search for videos based on when they were recorded. You can set the interval between recordings.
Conclusion:
Installing a Blink camera is a simple process. You can do it by just following the simple steps given above. Find a suitable location for the camera, mount it on a wall or ceiling, and place it in an area with good lighting and a clear view of the desired recording area. Use the Blink app to complete the installation and use the camera.
Further, if you need help logging into your blink camera, you can visit blink camera login.